All About The AeroPress: Recipes, Top-Tips, and Myths Debunked
Why is it that coffee and science always seem to go hand-in-hand? The humble AeroPress is a portable, cylindrical gadget, invented by retired engineering professor Alan Adler as a means of controlling the many variables that make the perfect cup of coffee.
Since its release in 2004 it has become ubiquitous in the world of both home and commercial brewing, with the AeroPress World Championships attracting thousands of entries each year.
Many believe the secret to its popularity is the incredible range of flavour balances that can be drawn out of a coffee by using different recipes - by varying grind size, extraction time, and water ratios, there truly is a method to suit every roast and every taste.
In this brew guide, we’ll answer some common questions and give you two basic recipes (plus a rather unusual bonus recipe!) from which you can start your own journey towards finding your perfect brew.
Get the Basics Right
There is a lot of hearsay about what to do and what not to do with your AeroPress to get the best coffee. If you want to get the most out of your AeroPress, however, it pays to look after the easy wins before you move onto tinkering with your preferred recipe.
If you aren’t already using filtered water, then grab yourself a simple filtration system (such as a BRITA jug that lives in your fridge) and use that. It will make the single largest difference to the taste of your coffee, across any brew method.
If you have a coffee grinder, then you’ll definitely want to use it. Freshly ground coffee is less oxidised and contains more oils than pre-ground coffee, leading to a more fragrant and fuller-flavoured bean. If you don’t have a grinder then you may be limited to changing the ratio of coffee to water, which means you'll have a bit less flexibility over your recipe.
AEROPRESS MYTHS
Some say that using two paper filters is a must, or even that you should dispense with them altogether and purchase a reusable metal mesh to reduce waste.
In reality, it’s up to you. By changing the size of the holes the brewed coffee is pushed through, you’re increasing or decreasing the resistance that membrane provides - metal meshes have large holes so water finds its way through more easily, and using multiple papers will make it harder.
Whatever you do, be mindful of the effect this will have on the other variables during brewing. For example, less resistance from a metal mesh filter will mean you’ll want to brew it longer before pushing through into your cup.
However, the biggest AeroPress myth is about whether turning your AeroPress upside down will make your coffee taste better.
But here’s the thing: It’s not a myth…
TOP TIP: THE UPSIDE DOWN METHOD
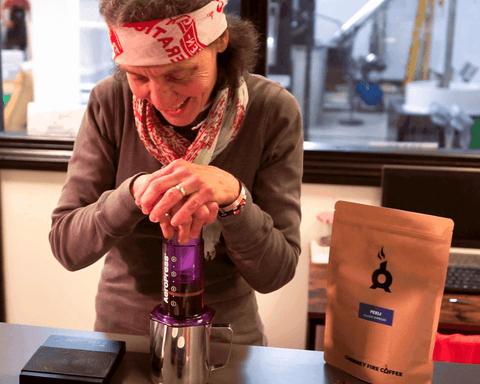
The ‘upside down method’ is widely-used, and is probably the most controversial topic in AeroPress brewing. As the name suggests, it involves inverting the whole AeroPress and using the airtight seal between the body and plunger to ensure no water leaks out during brewing.
Once the required brew time has been reached, the AeroPress must then be flipped back to the correct way up to allow the coffee to drain through the filter paper.
Why bother with this risky manoeuvre? The upside down method gives you perfect control over immersion time, as coffee will not seep through the filter paper - resulting in a purer extraction. If you can, it’s definitely worth giving this method a go and you’ll taste the difference.
If you’re giving the upside down method a go for the first time, it’s vitally important to do two things to avoid spilling hot coffee all over you and your worktop: Ensure the plunger is pressed in at least 1 cm so it is fully sealed, and once you’ve put the top on press out the small amount of air above the coffee before you flip your AeroPress over. Check out our video below to see what this looks like in real time.
RECIPE: AEROPRESS LONG/STANDARD
This is a classic AeroPress recipe which will highlight the unique flavours and acidity of lighter roasted coffees. Pour over ice and garnish with a thin slice of orange for a refreshing summer drink!
Perfect For | Lighter roasts and coffees with higher acidity
Grind Size | Medium
Coffee | 20g / 1.5 scoops
Water | 200ml
Ratio (Coffee:Water) | 1:10
Brew Time | 1 minute 30 seconds
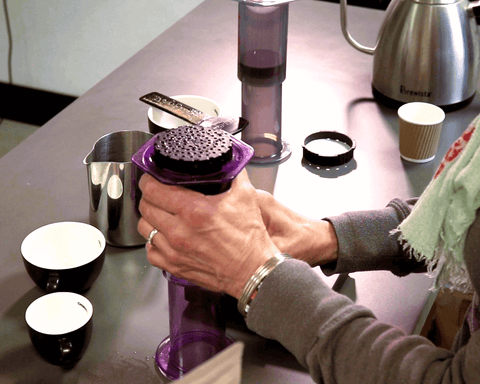
- Add filter to cap and carefully wet with hot water. This will also preheat your server (discard waste water).
- Invert your AeroPress by placing the plunger into the main AeroPress body, to form a seal.
- Add 20g of freshly ground coffee to the AeroPress (medium grind).
- Heat filtered water to around 96 degrees (or just off the boil)
- Pour 200ml hot water over the grounds, then stir vigorously for 10 seconds.
- Secure your lid, and carefully push out any excess air.
- Let it brew until you hit the 1 minute 30 seconds brewing time.
- Add your funnel, and carefully flip the AeroPress into your cup.
- Press down gently, taking around 20 seconds total.
- Remove AeroPress, and enjoy!
RECIPE: AEROPRESS SHORT/CONDENSED
This condensed AeroPress recipe uses a shorter coffee to water ratio, resulting in a strong punchy flavour close to espresso. Try this method for darker roasts and blends that have been created with milky coffees in mind.
Grind Size | Fine
Coffee | 20g / 1.5 scoops
Water | 100ml
Ratio (Coffee:Water) | 1:5
Brew Time | 1 minute 30 seconds
- Add filter to cap and carefully wet with hot water. This will also preheat your server (discard waste water).
- Invert your AeroPress by placing the plunger into the main AeroPress body, to form a seal.
- Add 20g of freshly ground coffee to the AeroPress (fine grind).
- Heat filtered water to around 96 degrees (or just off the boil)
- Pour 100ml hot water over the grounds, then stir vigorously for 10 seconds.
- Secure your lid, and carefully push out any excess air.
- Let it brew until you hit the 1 minute 30 seconds brewing time.
- Add your funnel, and carefully flip the AeroPress into your cup.
- Press down gently, taking around 20 seconds total.
- Remove AeroPress. and enjoy!
BONUS RECIPE: NO-PRESS AEROPRESS
If you missed our Unusual Coffees From Around the World blog, this one could perhaps make the list - but thankfully this recipe does not contain avocado!
What happens if you get the bottom half of your AeroPress set up, start the brewing, but then never put the plunger in the top? You get a ‘no-press’ AeroPress, that’s what. What you’re effectively creating is a drip coffee method, similar to a V60 or Chemex…
This recipe takes no more time to make than a quick cup of tea. Simply wet your filter paper, add 18g coarse ground coffee and 200ml hot water into the bottom half of your AeroPress, give it a quick stir, and just leave it to drip through.
It should take around four minutes total to drain completely - much less and it’ll taste weak, much more and it’ll taste overly strong and a bit stewed. It has to be said that, while acceptable when you’re in a bind, you won’t get the optimal flavour from your beans using the No-Press AeroPress method. This one is best saved for when you’re really in a hurry!